Friday, January 29, 2010

How Did I Get High Cholesterol?

If you've ever watched a health report on TV, an informercial regarding health, or a show exploring health epidemics in America, they usually have at least one or two interviews with an ordinary citizen who has said malady that is being discussed.  We'll call this citizen Joe.  Poor Joe has this or that, but never saw the signs before it was too late.  I secretly always thought to myself, Come on Joe.  You really didn't know you had high cholesterol when you ate rare steaks, burgers, bacon and cheese at every meal?  It doesn't take a dietician to know where that one was headed.  But the truth is, what was very obvious to me about Joe's diet was not obvious to him. Furthermore, what was never obvious to me just became a problem of my own.

I never thought I would have high cholesterol:  I eat a healthy diet, I exercise regularly, I don't eat a ton of read meat...  Wait.  Didn't I start eating cheese with much more regularity about 2 years ago?  Didn't I stop using egg whites for baking instead using whole eggs in recipes?  Didn't I get down with dairy on a serious regular basis 2 years ago too?  I was focusing on all the goods things I was feeding my body that I never bothered to check that many of my healthy, organic dairy products were coming with a decent amount of cholesterol.  Tricky...

My good cholesterol is actually extremely good, which is due to my love of olive oil and avocados but that bad cholesterol is definitely creeping up on me and I'm still under 30.  Dammit...  Part of this is also due to family history.  I come from a long line of cholesterol factories so I guess it was bound to happen, but on top of all my other restrictions I really REALLY don't want to add another.

Funny enough, eating a low-cholesterol diet isn't that hard to do.  Especially if you're cooking for yourself.  Partly, you have to read labels (which I happen to be excellent at), check portions, and add more fiber to your diet. Be conscious of what you're putting into your body.  You're also supposed to exercise a ton and lose some weight, but we all know I'm working on that.

Switching to egg whites is easy.  Eating pudding or yogurt instead of ice cream is doable.  I am having issues with the cheese though.

Which brings me to dinner two weeks ago.  Noodle-less lasagnas are a favorite of mine.  Mostly because when I make a noodle-less lasagna it's a giant unbreaded eggplant parm.  Yum... Eggplant parm...  But I digress.  I so wanted that a few weeks back but I couldn't help but think to myself, You should really limit your cheese now.  Maybe a lasagna isn't the best dinner to start with.


Bullshit!  my mind cried.  When have I EVER let a restriction tell me I can't make something?  That's right, the answer is NEVER and so lasagna shall be no exception.  I had to skimp.  I had to substitute.  I had to be frugal with the cheese.  But you know what?  It wasn't as cheesy, but it was just as tasty.  I love the flavor of eggplant and I don't need to drown it in cheese to trick myself into eating it.  Know your limitations before you try this.  I'm not claiming it tastes just like real lasagna, or that it will fool your neighbors and friends into thinking you got it from a restaurant.  This is a lower-cholesterol, lower-fat, noodle-less lasagna.  Try it, but it may not be your thing.

Eggplant Lasagna
Lower-Cholesterol, Lower-Fat


Fills a 9x13 dish, half if desired
Ingredients:
3 medium/large eggplants, sliced length-wise or in thin circles (I like to keep the skin on, cut in circles)
1 jar (25.5 oz) pasta sauce divided; have another jar on hand if you're a lots-o-sauce person, I'm not
1.5 lbs ground organic dark meat chicken, cooked until browned (optional)
16 oz nonfat cottage cheese (aka fake ricotta)
2 cups part-skim, low-cholesterol mozzarella
2 tbs crushed, packed garlic ( or several raw clove equivalent)
basil, oregano, salt and pepper (or crushed red pepper flakes) to taste
olive oil

Directions:
Preheat oven to 350 degrees F.
Arrange sliced eggplant on large cookie sheets.  
Optional: For softer noodle like consistency, brush eggplant with olive oil.
Salt and pepper eggplant.
Cook eggplant 5 minutes on each side.
Remove eggplant from oven.
Take optional ground chicken, which you've browned, and place in a large bowl or skip if you aren't using meat.
In a large bowl, mix cottage cheese, mozzarella, garlic, salt/pepper to taste.
In a greased 9x13 dish, plop a small amount of sauce to lightly coat the bottom of the dish.
Add the rest of the sauce to the cheese mixture, reserving about 2 tsb to dot top on lasagna.

Layering Process:
Layer eggplant slices over the bottom, slightly overlapping to crate the bottom "noodle."
Top lightly with cheese or cheese/meat mixture, spreading evenly.  
Sprinkle mixture with basil and oregano to taste.
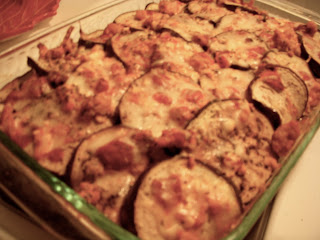
Camera's on crack.  I apologize.

Repeat layering process until you run out of filling and eggplant.  This will most likely occur after about 3 layers.  
Top the last layer with any remaining filling (I had a bit more filling then eggplant), very lightly sprinkle with a bit of mozzarella, and dot with sauce.


Place covered lasagna in the oven at 350 F for 30 minutes.
Lower temperature to 325 F for another 30 minutes.
Uncover lasagna and cook for 5-15 more minutes depending on how hot your oven gets or how wet your lasagna is.

The cottage cheese is a little trick I learned from a non-fat lasagna that my mom used to make.  I'm not a huge fan of it from the tub, but when it's cooked in things it really is a very good fake for ricotta in anything, i.e. GF Italian cheesecake.  You'll notice the filling only contains two cheeses (instead of the four types I would normally use: ricotta, asiago, parm, mozzarella) and no egg.  Like I said, if you're watching out for your sneaky cholesterol too, you may want to give this a go.  You can also use it as a template to pump it up for a full-fat, noodle-less lasagna.  As always, I substitute as I see fit; you should do the same.

Friday, January 22, 2010

I Love... Perky's Crunchy Flax (an Enjoy Life cereal)

I kind of worship the folks at Enjoy Life.  I think I've said it a few times before on my blog, but I feel like the company is somehow a good friend of mine due to the way I mention it often in casual conversation.  "But there is a soy-free chocolate that bakes well.  Have you tried Enjoy Life?"  "No, there's a totally safe allergen-free trail mix.  Have you tried Enjoy Life."  I speak of Enjoy Life the same way that other women my age casually mention their significant others or their children.  I however in no way have any intention of dating, marrying, or reproducing with an allergy-free institution.  Go ahead, call me pathetic.  But before you do, have you tried Enjoy Life?

I don't have to rattle off my list of allergies and diet restrictions for you readers as they're on the right-hand side of the page, but those of you who read my blog with any regularity know that I've got a lot going on.  Finding a portable breakfast food easily assembled at the office that requires no special cooking surfaces or equipment is a challenge.  When I knew I had to jump off corn, there went my cornflakes.  When I decided I wanted my one serving of complex carbs a day to be at lunch or dinner, I had to chuck my wonderful rice cereal in the morning.  After being told by my doc that I had a high bad cholesterol (thanks cheese) and that I needed more fiber in my diet, I did some research about Flax.  Flax is a seed, it is approved for low carb diets,  it and does not naturally have a significant amount of vitamin C.  Okay, 3 good things.  Then I saw some articles saying for some it's a little difficult to digest (boo) and heard that the flavor was an acquired, sometimes overwhelming taste (that sounded ew to me.)

Then I started to see a lot of press (traditional + bloggers and tweets) that Enjoy Life had re-packaged/re-named one of their products: a Flax cereal that I may never have considered eating before so many restrictions were in place.  I thought, What the hell, I love Enjoy Life, let's find this cereal.  

I found the box at the Venice Whole Foods, and looked at the cover.  Perky's Crunchy Flax.  I love the word "crunchy" on products.  Unfortunately for many allergy-free products, that claim tends to fall soft (pardon the pun.)  Did I dare to dream?  Then I read some of the nutritional details: 6g dietary fiber, 7g protein and 425mg Omega-3's per serving.  This is a coup for someone like me who can only get her protein through meat, cheese, and the occasional quinoa.  Such a high content of dietary fiber, and it's Gluten-Free?  And Omega-3's for all that fish I'm not eating.  The label passed the test with flying colors.

I was still a little nervous when I got it home.  I know I eat a lot of healthy foods, but I've never been way into the super-food movement and to be honest, I thought of Flax as a possible gross health food.  There I said it.  I, who have very few choices, was judging a food before I tried it.  What an uber-snob I was being!  So I poured a small amount of the cereal into a bowl.  The little balls reminded me of grape nuts.  I know this is going to sound weird, but the cereal looks cute.  I cut up a banana on top of it; I thought it would cut the Flaxy flavor I was bracing for.  I added a splash of Lactaid milk for just a bit of moisture.  The spoon rose to my mouth, my lips parted, my eyes closed, and I silently prayed for a foodgasm.

Success!  Where's this awful acquired taste I'm supposed to be afraid of?  It's not here.  The balls are mild and have a slight positive aftertaste that reminds me of when I was a child eating dried chow mein noodles out of bowls in Chinese restaurants.  The banana matched the small sense of nuttiness perfectly with its smooth flavor and texture.  And was the cereal crunchy?  Hell, yes.  Even when the milk tenderized it a bit, the texture was still on the crispier side and really made me feel like I was chewing my food instead of just squishing it around in my mouth.  The best part?  Because of the fiber and nutrition packed into the cereal, my stomach didn't start growling an hour before lunch like it usually does.  This kept me full until I was supposed to eat again.

So once again I find myself saying, I love you Enjoy Life.  You make an allergic girl facing the world happier product by product.  And even better, now I have a non-complex carb alternative to use when making portable snacks like cereal bars.  Keep testing, creating, and putting out new products.  I'm a greedy bastard ;)

Wednesday, January 20, 2010

Meringue Madness

Meringue cookies are just about one of the easiest naturally GF snacks/desserts that one can whip up.  All you need is an electric mixer of sorts (unless you want to beat egg whites by hand vigorously until said hand falls off) and a lot of patience.

The first time I made meringue, it wasn't exactly amazing.  I didn't really understand why, but it was kind of squishy inside.  It wasn't until I read more about the wonderful world of stiff-whipped egg whites that I learned about a little thing called "drying time" that is absolutely necessary to achieve desired meringue texture.  This is also where that patience comes in.

In order to whip up perfect meringue cookies, in my humble opinion, I recommend at least 8 hours of drying time.  Yeah, I know 8 hours sounds like a long time, but think of the last time you made an icebox pie or a gelatin or anything frozen that required 4, 6, or sometimes a day's worth of time to hang out and achieve greatness.  So indulge me the 8 hours.  I promise you, you'll find it's worth it.

The other little note about cooking large quantaties of meringue cookies is that you have to watch them.  Normally, recipes call for low temperatures for small amounts of time, but with this method I find that the meringues are too under-cooked to ever firm up no matter how long you dry them for.  I raised my temperature slightly and increased my time, but I watched them like the tricky bastards they are.  The second those puppies got a hint of gold on them and were mostly firm to the touch (like a soft baked cookie) I shut that oven off and let the drying begin folks.

The funny thing about the below recipe is you'll notice I used banana extract.  It's because originally I wanted chocolate-chip banana meringue cookies.  The cookies never had a hint of banana flavor to them, but I never removed the ingredient for fear it was some magical X factor.

Alright, your turn now:

Chocolate-Chip Meringues
aka I Can't Believe It Smells Like Tollhouse Cookies


Ingredients:
(makes around 50 cookies)
4 egg whites from X-Large, organic eggs
1/4 tsp sea salt
1/4 tsp cream of tartar
2 tsp GF vanilla extract
2 tsp banana extract
1 1/2 cups evaporated cane sugar (fairtrade if you can)
6 oz of mini chocolate chips (my favorite is Enjoy Life!!!)

Directions:
Preheat oven on a high temperature, i.e. 400 or 450 F.
In a large bowl, beat the first 5 ingredients together using an electric mixer on low-medium speed, until you reach a soft peak form.
Pour sugar in slowly while beating the mixture until the sugar is incorporated.
Beat carefully until you get stiff peaks (if you remove the beater from the mixture you'll notice a peak that can stand on it's own).  Go slower than faster.  If you over-beat, the meringue will not come together.
Fold in chocolate chips.
Using a tbs, drop meringues on two large cookie sheets lined with parchment paper (use the parchment, trust me)
Place the cookies in the oven reducing the heat to somewhere between 275-350 F, depending on how hot your oven gets.  Remember we want to cook them slowly but not at a glacial pace.
Watch your cookies (10, 15, 25 minute marks) and the second you see any golden goodness appearing or if you touch them and the cookies feel like they're firming, turn the oven back up to a high temperature for a moment, close the oven door, then SHUT OFF the oven.
IMPORTANT: If you leave the oven at a high temperature for 8 hours, you will not only burn the meringues, but you will likely burn down your house too.
Let the cookies dry for 8 hours.  If after 8 hours for some reason you touch the cookies and they're supersoft, rebake at low heat for 15-30 minutes more and dry for a couple of hours.  Repeat until they're complete.  The amount of time it takes depends entirely on your oven.  Once you make the cookies once, you'll know how to run the show next time.

Even though I try not to eat too much sugar, I do love these little yummies.  They're great for portable snacks or to share with friends.  Just don't forget to store them in a tight, closed container.  Go ahead; dry something else besides your clothes for once.

Wednesday, January 13, 2010

The Greatest Mystery of Them All

I'm not feeling well... again.  This seems to be a recurring thing with me, but now I'm seeing even more that its a recurring thing with most Celiacs who are also allergics.

Digestive issues (gotta love the vagueness of that symptom) seem to be tied into every auto-immune disease that exists and of course the issues can also be the cornerstone of figuring if gluten is making you miserable or if perhaps you're allergic to something(s).  For some, eliminating allergens and/or gluten from the diet solves everything.  I am apparently not one of those people.  For me, it's always been a combination of all the above.  I chucked the gluten per the doctor's orders, I eliminated my allergens, and in return I expected to never feel ill again.

I share this with you dear reader because I hear every day the reported mystery miseries that seem to plague us all with digestive issues.  For example, most people I have met with Celiac don't just have that, but also have auto-immune complications/symptoms that are indicative of something else or something greater.  And a good 50% of those people have been tested for everything under the sun unsuccessfully.  No one knows what's wrong with them (don't even suggest IBS, which is just code name for we don't actually know what's causing your problems so we'll call it IBS so you feel better about it.)  It's driven many of us to read countless books or take to the internet and try to diagnose ourselves (this will drive you nuts by the way.  I don't recommend it though I won't say I haven't done it at length.)

Medicine has made leaps and bounds over the years, and with the aid of quickly budding technologies, we're learning more and more every day about all sorts of internal functions that we didn't understand before.  But still, I'm being told, we just don't know enough yet...

The things that are making my life difficult right now fall into the category of "we just don't know enough yet."  As I sit here trying to keep a positive outlook on things I ask myself, when will we know?  When will I know how to feel better and function like a normal person would?  When will I have metabolism again and why is there nothing out there that's safe to jumpstart it?  When will I gain my energy back?  When will my digestive system stop declaring war on my body?  The list goes on and on.

I've been to doctors.  I've been to specialists.  And all that I know is that we just don't know enough yet.  I know how hard it is to be patient when you're feeling crappy, but you're not the only one.  It's not your fault, and maybe you're doing everything that you know can be done.  Just hold on, because one day we will know enough.  And I can't wait for that day to come.


*I'm going to a new Gastro next week.  Fingers crossed folks.  I'm going to try and solve this bad boy one symptom at a time, if it's the last thing I do!

Monday, January 11, 2010

Has It Really Been Almost a Month?!

Yikes! I guess it has been almost a month since my last post. You know, the holidays should be the time when bloggers hunker down and share all their amazing holiday cooking with the world. But apparently, I did the opposite. I went completely M.I.A. and tried to enjoy a little down time this holiday season, once again at my blog's expense. I totally missed my blog-a-versary for one. I've never written consistently in any one format for over a year, so I'm pretty jazzed about that milestone. I guess I feel compelled. The power of cooking has compelled you. That's as funny as I'm going to get on a Monday folks. Stay tuned for more hilarity as the week continues.

In the meantime, why don't I post some of these recipes I've been holding hostage from y'all.

One super duper, easy side to make is Spaghetti Squash. My dear friend and one-time college roommate introduced me to the amazing world of squash, and she showed me how incredibly easy it is to produce full and fall-rich flavors. When I was in college in upstate NY, we could go out and pick our own apples, pumpkins, and squash and nothing tastes better than fresh from the farm. Naturally, I fell in love.

Since I eat only one serving of complex carbs a day, usually in the form of quinoa, rice or rice products, I have to get creative with my side dishes. There's only so many vegetables that are low-medium oxalate, and there's only so many ways to cook them. Spaghetti Squash makes the best fake carb side dish ever: it's filling, full of flavor, and has the look and feel of a nice starch. Ready to see how easy this is?

Quick & Easy:
Roasted Spaghetti Squash


Ingredients:
1 medium to large Spaghetti Squash
olive oil
sea salt
pepper


Directions:
Preheat oven to 350 degrees F.
Rinse the outside of the squash.
With a fork, make puncture vents piercing the skin of the squash. Vent all sides of the squash.
Place squash in a pan, then pour about an inch of water into the pan.
Throw that pan in the oven, uncovered for about an hour (al dente) to an 1.5 hours (mushy.)
Remove from oven.
Carefully, cut the hot squash in half, length-wise, and scoop out/trash the guts.
Using a fork, grate the flesh of the squash. You'll notice spaghetti-like strands emerge. Grate until the entire squash is used.
Carefully put the grated squash into a big bowl and dress with olive oil, salt & pepper to taste. If you prefer to get grand with it, use sauce and cheese. Me, I'm a simple girl :)


Quick, easy, and cheap. You can't beat fake spaghetti with a great source of vitamin A, potassium, and folic acid.